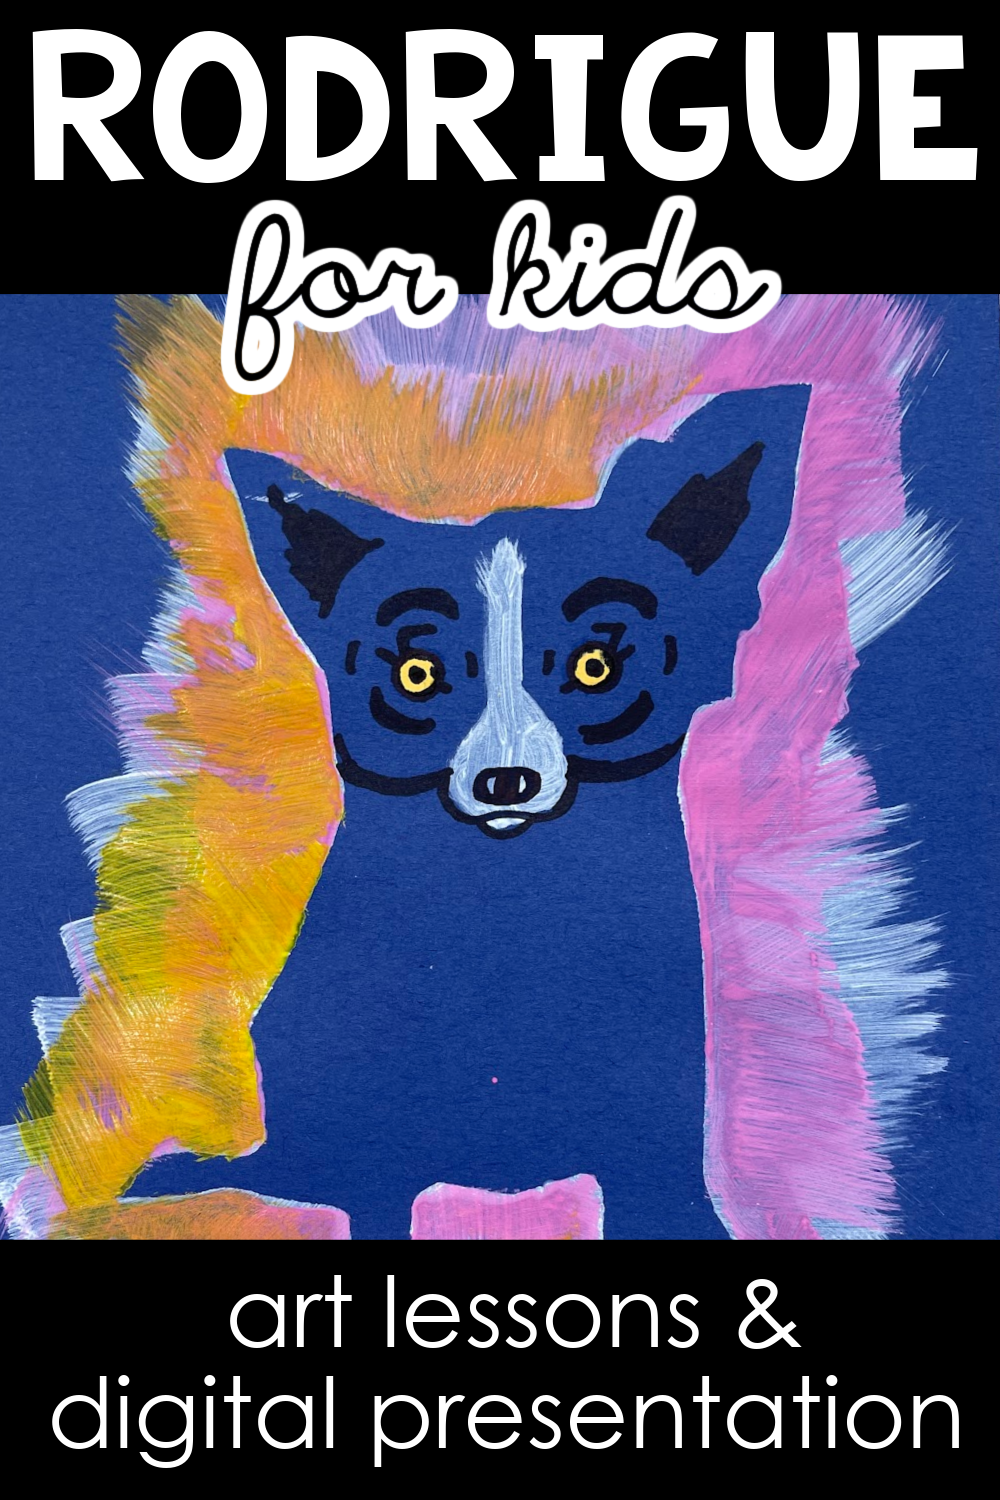
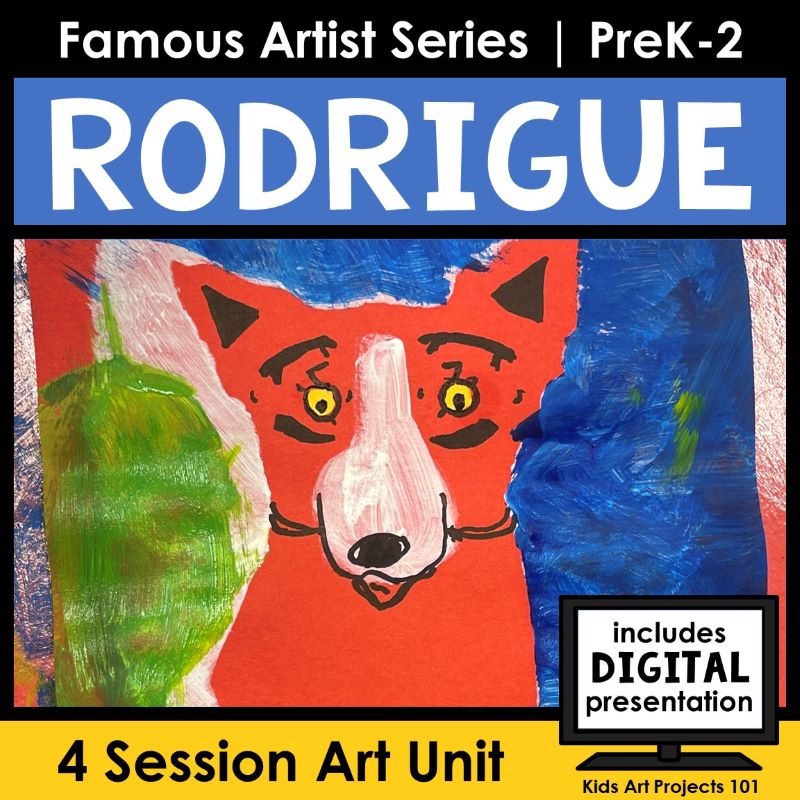
This George Rodrigue Blue Dog Art Project is part of my second grade art curriculum. It art project encourages imagination and creativity, letting students create their own version of Rodrigue’s Blue Dog. It’s also an engaging way to introduce young artists to abstract backgrounds.
Famous Artist Series from Kids Art Projects 101
This approach is awesome because it layers art history connections with guided instruction about the elements of art and principles of design. The scripted PowerPoint format can be easily utilized in a variety of settings. In this video, I share specific tips and considerations to help you easily implement the unit.
Watch the video, or read the transcript below if you prefer.
~VIDEO TRANSCRIPT~
Hi Everyone,
I am super excited to present to you the 25th installation in our famous artist series. This one is all about Louisiana artist George Rodrigue. He’s best known for his Blue Dog paintings.
If you’re familiar with them, awesome! If not, as soon as you get into this unit, you’re going to become quickly familiar and you may realize, so, wait a second, I have seen this guy’s stuff before!
Now this unit, as I have set it up, is broken into four distinct work sessions. In this video, I’m going to give you an overview of how I set that up. Obviously, if you need to change it a little bit for your setting you should be able to. In a perfect world, the four sessions I have set up would be about 40 to 45 minutes long, so just be aware of that.
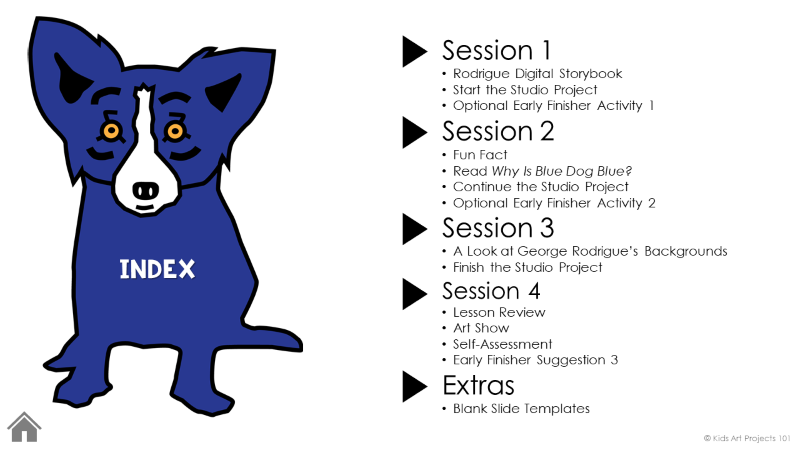
GEORGE RODRIGUE ART PROJECT SESSION 1
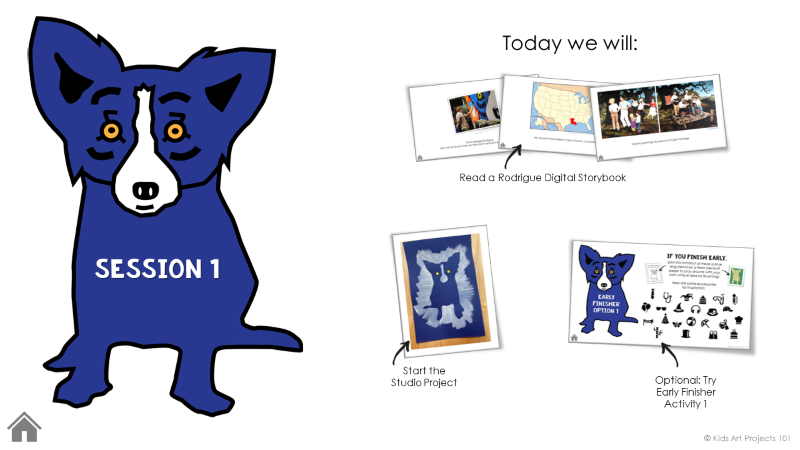
Preparation
One quick thing that I want to explain before we go any further is that George Rodrigue’s artwork is protected by copyright. So, he’s one of those artists that I have to be really careful how I want to share with you what I actually use in my room.
As educators, we’re able to go online and copy whatever we find and put it into slide shows but with an artist whose stuff is protected by copyright, I have to be careful how I share it with you. So if you’ve seen any of my units before that focus on artists whose stuff is protected by copyright, I found a workaround but it does require a little extra step for you at the very beginning.
I do not recommend doing this live in front of kids. It’s not that complicated, but it does take a minute, so I do recommend that you open up the resource.
You’ll see throughout the slideshow that there are gray boxes wherever I show artwork to my students. So what I did was, I put a hyperlink right under that gray box. If you click, that hyperlink will jump you right to that exact image file online. You will need to copy it and put it into your resource.
You, as an educator, are within your rights to copy stuff you see on the internet and use it with your kiddos. But once I’m sharing it with you as a commercial product, that’s where it gets a little weird. I wish I could save you the trouble and just hand you the file as I use it, but we have to obviously respect an artist’s copyright laws. That’s something we should respect either way.
So just be aware that in your resource overview, I listed all those links so it shouldn’t take you more than 5 minutes to copy those images into your own slideshow and then resave the slideshow as a new name so that it’s all saved in there. So, just be aware of that.
There is another thing that I would highly recommend you do before you hit the ground running with this with kids. Set up some stencils. This unit requires the use of a stencil. It’s a little dog-shaped stencil in the style of Blue Dog. I included a printable in the file that has three dogs on it.
I would print enough copies of that paper so that you can hand every single kid one of these. I printed them on a manila-like tag board and then cut them out. That takes time. Maybe you could have one of your fifth graders or parent dividend help with this part but the good news is once you have a class set, you can use it for years. So, while it is a little extra work at the beginning, it’s a good investment because then you have this resource for a long time.
Now the way I make it last for years and years and years is that I coat this. The deal is you’re going to be laying this on a piece of paper and then using a sponge brush to paint around it and if you paint on any kind of paper, that paper tends to curl, and then it’s not really a great stencil anymore. But I’ve learned from trial and error that if I spray clear spray paint, they do not curl.
I lay them all out on big a piece of cardboard outside of my classroom and I spray them with a clear coat. It doesn’t necessarily have to be clear. I use spray paint. It needs time to dry, obviously. You can flip it over and do the other side if you really want to be careful.
That alone keeps the stencil from curling, once the kids apply tempera paint to it. So I highly recommend doing that so that. You can make use of these. Another option would be to paint them with Mod Podge. You can laminate them if you want. I don’t. I’m concerned with the laminating idea of moisture getting in, if you’re really trimming this close for the stencil outline.
But just get creative with that and coat these so you really can have a resource that’s going to last a long time. Okay, so those are the things that you want to be aware of before you even start. That’s prep work that needs to happen. Once you get that stuff done, the rest is smooth sailing.
Digital Storybook
So you’re going to be presenting a digital storybook all about George Rodrigue. He was an artist who painted all about his Cajun culture, his heritage, the landscapes, the people, and the stories he heard growing up.
You’re going to be telling the kids that his goal was to illustrate a painting of the folktale Cajun folktale called the Loup-Garou. I don’t know if I’m pronouncing that right. That seems to be how I hear it online. Loup-Garou is a French word for werewolf. The story is that this werewolf comes out on the night of the full moon.
George Rodrigue is quoted as saying his mother would tell him that the Loup-garou would come and eat misbehaving children. You want to make sure you present that in a fun lighthearted way so that you’re not freaking out your students. You very quickly say George Rodrigue understood this wasn’t true but it would still trigger his imagination.
What would Loup-Garou look like? What do you think the Loup-Garou would look like? Then you get them thinking about it and they have fun with it. I haven’t had any kids react in a frightened way but I do make a point to really present it in a fun lighthearted way so I recommend going that route. But know your audience. If you’ve got some timid kind of frightful little kids, maybe prep them in advance or something like that.
Anyway, then you present to them the first picture he made. His blue dog was his interpretation of the Loup-Garou. You will then show them a bunch of slides that transition how that painting went from representing this folktale to taking on a life of its own.
Start the Studio Project
Then you transition into the studio project, which will have them creating a blue dog-inspired work of their own. Now that involves laying this on a sheet of six-by-nine construction paper. They would lay it right here. They would use a sponge brush and they make a reverse print of the dog that can then be set somewhere to dry and be reused.
Once they have the outline while they have a little bit of wet paint, I use white, then I recommend getting a paintbrush and having them paint on the little snout of the nose and it’ll prompt them to glue on two yellow hole-punched eyes. Then they leave that to dry.
Early Finishers
There is an early finisher option, which puts a bunch of accessories up on the screen, and there’s a printable. It looks like this. You can also have them trace the stencil that they just used at the beginning of the studio project. The idea is that they make the dog any color they want and they can add accessories.
You’re showing them all kinds of examples of Blue Dog as a Pilot Blue Dog, as an Astronaut Blue Dog. There are so many examples of Blue Dog in different getups. So the idea is for them to come up with one of their own. That’s just if time permits.
That’s if you have a few early finishers. Don’t stress over that part. Like I said, you could hand them a blank piece of paper and have a few of them have fun with that, if not, everybody ends up with time. You can also use that as an early finisher in any of the other sessions of the unit.
GEORGE RODRIGUE ART PROJECT SESSION 2
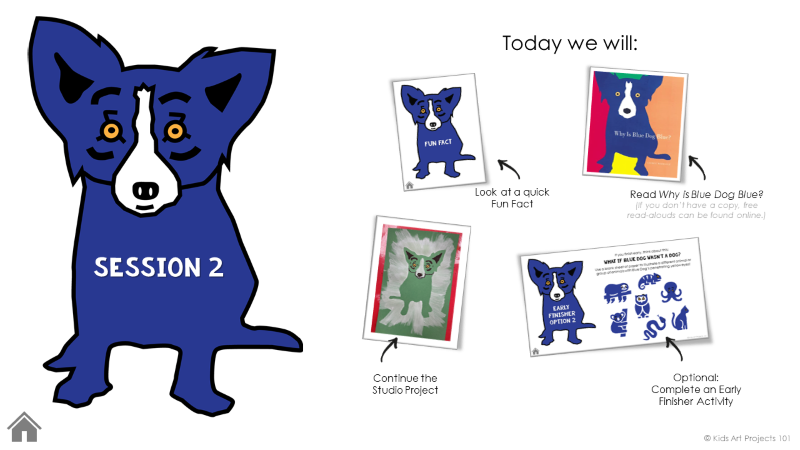
Fun Facts
So when they come back for Session Two you’re going to present a quick fun fact read aloud and the read-aloud is a book by George Rodrigue. It’s called Wise Blue Dog Blue. It’s a cute book and it exposes them to lots of different colors.
Now you know Blue Dog isn’t always blue. Sometimes he’s red. Sometimes he’s yellow. So you’re just having fun with it and reviewing different colors; chartreuse and burgundy and those lesser-known colors.
There’s lavender and a lot of them they’ve heard of before… avocado, alabaster… but there are some unique names in there that’s exposure to lots of colors in the artists’ world.
Continue the Studio Project
So they’re going to then transition into some drawing work. There is a step-by-step guide in the slideshow that will walk them through using a sharpie marker right on their dried print from Session One and adding all the details of the face of this dog.
It’s perfectly acceptable for them to take it in a unique direction if they want to, but the step-by-step guide sticks to the basics inspired directly by George Rodrigue’s actual Blue Dog image, and that should take you to the end of Session Two. That drawing work is detailed and takes kids a second to get through.
Early Finishers
There is an early finisher option on that session as well, and that one doesn’t involve a printable. It’s a drawing prompt that just says What if Blue Dog wasn’t a dog and so there’s a bunch of other animals: an octopus, a cat, an owl.
They’re blue but they have those same Blue Dog penetrating yellow eyes so the idea is that they just grab a piece of paper and sketch a different animal with the same look. It’s a fun one.
It’s just one of those prompts that inspires them to come up with all kinds of creative ideas. So again, that’s just optional. You can just give that to the few random kids who finish early, if time permits.
GEORGE RODRIGUE ART PROJECT SESSION 3
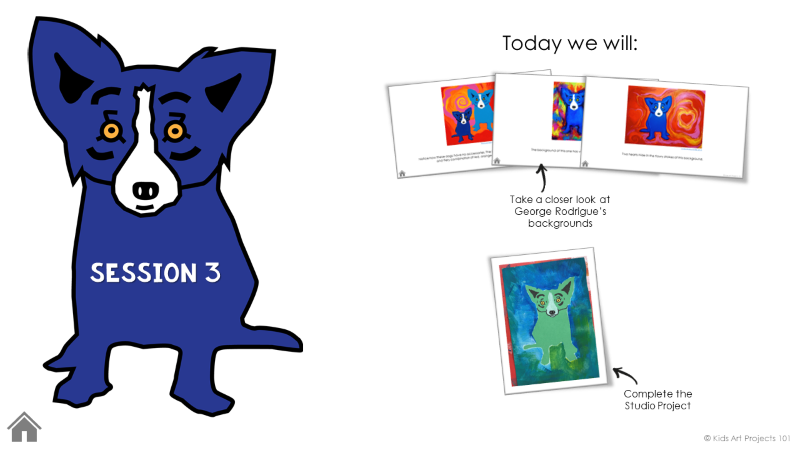
George Rodrigue’s Works
So then in Session Three, you’re going to be showing them a couple of Rodrigue’s later works. His background in his later works got a little less, I don’t know what the word is, fewer accessories.
It wasn’t so much Blue Dog in a costume to align with a certain theme. It was more of a painterly background. So you’re going to expose kids to the idea of an abstract background. They’re going to, in Session Three use a sponge brush to really pull out the background.
Complete the Studio Project
So here’s an example. You can see some of the Sharpie work from Session Two but in Session Three, that’s where you’re giving them a paper plate with some tempera paint, and a sponge brush. They’re using the sponge brush around that basic dog shape and adding color.
Now they can do it in a variety of ways with a variety of colors. You’re giving them a variety of paper choices. I don’t know if I mentioned that for the dog in the first place. So you really do end up with a nice wide variety of outcomes for this project.
If some of them get really hung up on the idea of I want to make him look like he’s at a birthday party or I want to make him look like he’s snorkeling or whatever, you can certainly allow for them to add any accessories you want. But that’s all time permitting.
A lot of kids really take their time with this painting part. It’s really fun for them to apply the paint, mix colors, and focus on that. That is perfectly OK. Once you get through that, you are going to move on to Session Four.
GEORGE RODRIGUE ART PROJECT SESSION 4
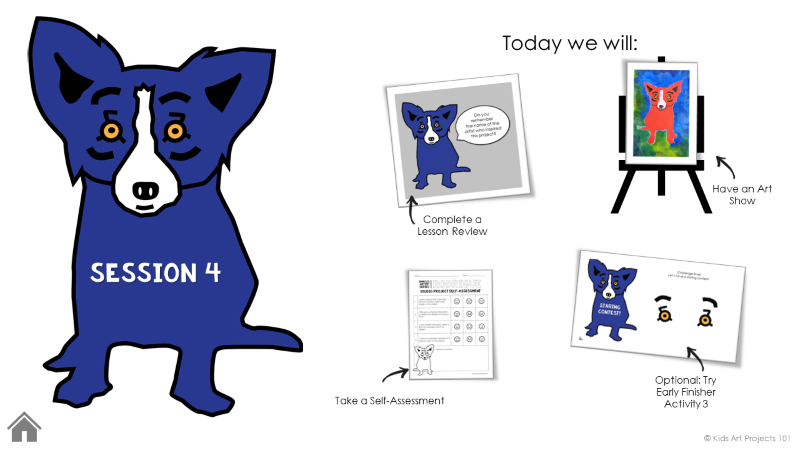
Session Four involves the basics that I always include in the final session: a lesson review, and an opportunity for an art show.
Both the review and the art show include some prompts that I’m putting there for you. They are just suggestions. Some things you could be asking them in a review or discussion prompts during an art show, but that’s all customizable too. Feel free to flip those out.
Self-Assessment
I put blank slides in the resource so that you could add your own details into each of those sections and customize them if you want. There’s also a self-assessment. Let’s see if I can pull it up on the computer. The self-assessment has four little statements. They’re basically rating themselves.
- I used a stencil and a sponge brush to create a basic dog image on my paper.
- I followed a step-by-step guide to define the details of my dog’s face.
- I used at least two paint colors to fill in the background of my design.
- I used my materials carefully and tried my best on this project.
There’s also a spot on the self-assessment to leave individual comments. If you have time to do that, that would be awesome. You can print a self-assessment out. It’s the same format as they always are with my other units but you can also project it on a screen and walk the kids through it step by step and have that be more of a conversation if you don’t want to deal with printing all those out.
I sort of am 50/50 about that. If I have time and ink in my printer, and paper then I’ll go the printed route because I think it is a nice advocacy piece for sending home with the finished projects. It helps parents understand what went into this. But the reality is that is all a process and sometimes it’s quicker just to talk the kids through it. So your call on that one.
Early Finishers
I put in one little early finisher at the very very end. It’s a staring contest. The kids love staring contests. You can have a little tournament style if time permits.
It’s just for fun and if there’s a screen of Blue Dogs’ eyes staring out at everybody. So the idea is that they use that as inspiration to look and stare at each other and just have a fun staring contest.
That’s it for this unit. I hope that you guys have fun with this. I would love feedback. If there’s anything you have tried in the past that works really well or questions you have please never hesitate to reach out. Hope everyone’s doing well and I will check in with you next time!
Introduce children to famous artworks and details about American artist George Rodrigue in this series of four elementary art lessons. Use the done-for-you digital storybook to look at the works of this famous artist and introduce students to a brief history of Rodrigue, the Blue Dog series, and abstract backgrounds. Then use the digital presentation with step-by-step art project directions to guide young artists as they create their own Blue Dog art work.
Inside the unit you’ll find a 26-page PDF unit guide full of information and tips for teaching this series of art lessons to students in preschool through grade 2.
The unit is broken down into four 40-minute sessions.
✨You don’t need a lot of background knowledge of the artist or art curriculum, and you don’t have to do any extra research to teach these art lessons. I’ve included all the details here for you to open and go. Think of how much time you’ll save on planning!
For each session there is a guided digital presentation that has already been prepared for you and can be used via Google Slides or PowerPoint. The presentation also introduces and guides you through completion of a studio project and follow-up activity.
The 110-page combined PDF and Google Slides full resource includes:
- An original digital storybook designed to expose students to famous artworks and details about George Rodrigue
- Blue Dog-shaped printable stencils
- A fun fact
- A literacy connection to Why is Blue Dog Blue? by George Rodrigue (book not included)
- A step-by-step studio project guide with clear directions and visual samples
- A look at Rodrigue’s abstract backgrounds
- A digital lesson review
- An art show prompt with guided questions
- A printable self-assessment
- Early finisher suggestions
- Blank slide templates

 Edvard Munch The Scream Art Project and Elementary Art Lessons