This Henri Matisse Abstract Art Project is part of my kindergarten curriculum. Because it is very visually interesting, it is an excellent way for young kids to begin exploring organic shapes and abstract design.

Famous Artist Series from Kids Art Projects 101
This approach is awesome because it layers art history connections with guided instruction about the elements of art and principles of design. The scripted PowerPoint format can be easily utilized in a variety of settings. In this video, I share specific tips and considerations to help you implement the unit with ease.
Watch the video, or read the transcript below if you prefer.
~VIDEO TRANSCRIPT~

Hi Everyone!
I am so excited to present to you the 12th installation in our famous artist series. This one is all about Henry Matisse. The purpose of this video is to help you get a sense of how it is organized so that once you start with your kiddos you can hit the ground running. So let’s dive right in.

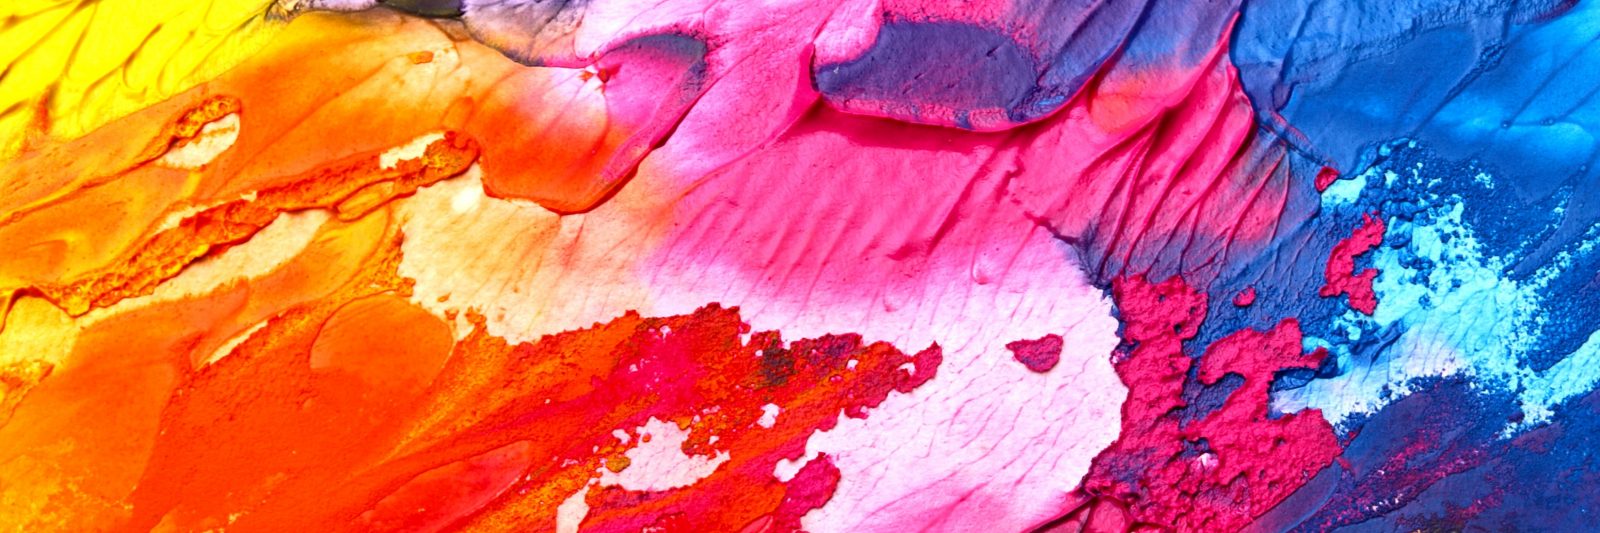
HENRI MATISSE ART PROJECT SESSION 1
I’ve organized this into four distinct sessions, ideally 40 minutes each, but if you need to customize it you should be able to.

Henry Matisse Digital Storybook
The first session has you presenting a digital storybook. It is designed to get kids really familiar with Matisse’s artwork overall, but also give them a sense of how he started making paper cutouts. It’s a cool, inspirational story of overcoming an obstacle in a creative way. I hope that that is inspiring for you and for your kiddos.
Then after you get done with the digital storybook, you’re going to dive right into the first component of the studio project, and that involves paint.
Now if you are looking for some shortcuts, you could skip this first chunk of the studio project and just work with a variety of colors of construction paper. If time permits, I would suggest not skipping this because it is really fun and involves paint.
Begin Henry Matisse Studio Project
Just like Matisse did with his assistants, you’re going to be preparing a bunch of paper by painting it all with a whole bunch of different really cool colors, and then using that painted paper as your paper for Session Two’s cutouts. So if time permits, like I said, don’t skip this part. It’s fun.
You’re going to be having kids use a sponge brush to paint an entire piece of paper from top to bottom, left to right, the whole thing with lots of different colors. The most efficient way to do this is to divide and conquer.
I tend to have a session set up for orange paint, yellow paint, blue paint, green paint, and I will put three or four kids at each station with a stack of white paper and a handful of sponge brushes, and just one color of paint.
Their goal at that station is to paint as many pieces of paper fully in a solid color as they can, and just keep moving them to the drying rack, start another one, move it to the drying rack, start another one and keep painting until you either run out of paper, run out of paint, or run out of time.
Once you are done, leave all that stuff on the drying rack and keep it on deck for Session Two.
HENRI MATISSE ART PROJECT SESSION 2

So Session Two will be all about shapes and cutting. You’re going to start off with a quick look at a really cool storybook called Matisse’s Garden. It’s a precious little look at the types of shapes he liked to use, which were organic shapes.
Defining Shapes
I define organic shapes as irregular shapes. That can still be a little broad and overwhelming to young kids especially. So I tend to categorize organic shapes.
Leaf Shapes are a type of organic shape that’s basically any irregular shape that has curves.
Then another type of organic shape would be a Star Shape. Now a Star Shape again is irregular but it has jagged edges instead of the edges in the Leaf Shape where we have curved edges.
Then there are Line Shapes. This is where you are going to have your zigzag, your spirals.
The last category is what I call Repeaters. These are little guys, you can use geometric shapes, so they would not be organic. Those are regular shapes. They are small and repetitive. So if you can get kids to think of sets of five to seven little shapes that will be useful.
You’re going to help define those shapes and really try to check for understanding that kids can identify a curved organic shape versus a jagged organic shape versus a line type of shape and even leftover shapes.
These are something you see a lot in Matisse’s work they are something we are going to include too. That would be called negative space. It is the shape itself and the shape around that shape.
So I set up a little bit of a structure. I hope this doesn’t come across like we’re aiming for some kind of cookie-cutter where everybody has the same outcome, but because the whole nature of this lesson is really cutting practice, kids benefit from a little structure in my experience.
If you hand kids all that gorgeous painted paper that you made in section Session One with a pair of scissors, they’re going to cut their little papers up, but you’re going to end up with what looks more like confetti. Confetti is beautiful but it’s not going to be super useful for you in Session Three.
Cutting Guidelines
So what I like to do is give them some very specific guidelines for what they’re going to be aiming for, once they go to the tables and start to cut out these shapes. So I tell them to aim for three leaf shapes and three star shapes.
Now they can be different colors, they can be different sizes, Just anything with a jagged edge and pointy parts counts as a star. So just three leaves, three stars, three lines, and then a set of repeaters. Then if they want to toss in some leftovers we can do that too.
That’s an ambitious list. I included it in the slideshow. If kids don’t get all the way through that list, of course, that’s okay. They’re welcome to share shapes with other friends. You can cut some backups. They’re welcome to come pick through if they didn’t quite get the fullest complete set, but you want them to have this ambitious goal so they are busy trying hard and practicing cutting for the remainder of the session. You don’t want someone cutting one line, and putting it in their bag, and saying, “I’m done!” So it is purposefully ambitious.
Scissor Safety
Before you set them free to tackle this list of goals, I want to talk to them about scissors. That’s an important extra thing to add in before you set them free. That scissor talk is really all about scissors safety and just making sure everyone’s on the same page about how to hold a pair of scissors and just how this tool works.
You can show them a little video in Session Three that shows Matisse working with scissors. They are huge scissors that are kind of fun to see him working with but basically, I include a little scissor safety song.
Open. Shut.
Open. Shut.
Keep your thumb on top.
Point the blade away from you.
This is how we cut.
I have other songs relating to scissors in our membership area of the website, so if you want to use some, or if you know another one, please share it with us.
But basically, you want the blade away, you want the thumb on top. I’m a lefty so you might be doing this backward, and you want the elbow up. This is what we’re aiming for.
I see kids all the time with the most bizarre grips or they’ll be doing this thing, aiming back for themselves, they get all caught up in it, and so they seem to appreciate a little extra guidance to make sure they’re holding it right.
Then the other thing you might want to model, and there are some cool videos online where art teachers are talking directly to kids that you can utilize if you want, or you can just model it yourself, but you want the kids to get in the habit of holding the scissors doing the chopping stationary. You’re not moving the scissors around.
Keep the scissors in one spot and move your paper around. Even if you cut a zigzag, the scissors are staying still, the paper is what is moving. So while they’re working you’re going to be circulating around the room checking very carefully like a hawk for good technique.
You can constantly give them some good feedback when you see them holding it the way you would like to see them holding it or just correcting them in a friendly way, anytime you see them sort of falling off. Their general nature is to want to turn those scissors in on themselves so you are constantly reminding them, “Nope, blade points away from you.”
Cutting The Shapes
So once you go through that little scissor chat and outline what you want them to cut, you’re going to disperse the paper communally. We didn’t write names on the paper in Session One, so it’s fair game. These are OUR papers, and everybody gets to share all of them.
They pick up a piece of paper, try to cut out what they want, and then, once they get a little batch going, have them collect what they cut into a zip-lock bag with a little post-it note with their name on it.

Once they run out of time, you collect these and save them for Session Three.
I also made templates and I want to make sure you’re aware of this. I have Leaf Templates. I have Star Templates. I even made some Line Templates.
If you think your kids would benefit from this, print a couple of these out, cut the pieces on cardstock paper, and then randomly spread them out in the room so that anytime a kid is struggling and doesn’t really want to admit they need some help they could just pick up the stencil, place it on their painted paper, and trace it.
Maybe that’s all they need to just have a little more guidance for cutting. Sometimes it might really need you to sit with them and work through it together but sometimes a stencil is all it takes to give them the ability to solve that problem independently. It’s huge. So take advantage of that if you want to.
HENRI MATISSE ART PROJECT SESSION 3

Then for Session Three, I’m going to go over some fun facts. I think that’s where I put the video of Matisse working with the link to the video where he’s using these massive scissors and just cool to watch.
Art Composition
In that same video you see him starting to play with his own composition and this is what Session Three is all about. It’s composition. How are we going to arrange these shapes that we cut out onto a piece of paper?
So you’re giving them a plain black piece of construction paper. I go for 9×12, but that’s flexible. Then you’re going to have them lay that black paper on their table and then get their Ziploc bag full of shapes and then empty them all out.
Then they’re basically going to spend some time without any glue on deck. Just explore different composition options.
You are going to show them Matisse’s collages where everything is placed somewhat randomly, the way they are placed.
Then you are going to show them some of Matisse’s collages where everything looks extremely symmetrical. So you’re going to ask them if they can come up with some specific balance.
Have them play for a few minutes with their arrangement. Have them focus on overlapping or layering, putting different colors side by side.
How do they react to each other? How do different types of shapes look near each other? Really hone in on the idea that they have choices and that their best idea is not necessarily their first idea.
So you want them playing, but once they’ve had a little ample time to explore their options, then you set out the glue.

Gluing
That’s when you get them to commit to a composition. So you want them to end up with the composition they feel good about.
They do not have to include all their shapes in this. They can share shapes, they can delete shapes, and they can do whatever they want.
They also can think about what is the top. Maybe this is where they want to write their name. It’s up to them.
Just encourage them to experiment a little bit. Sometimes an unexpected orientation stands out as the best one, So if they’re not ready to commit, of course, they can always write their name on the back.
That’s it for Session Three.

HENRI MATISSE ART PROJECT SESSION 4

If you have to cut something for time, you can cut some corners on the fourth session because Session Four has nothing to do with creating the studio project. Session Three is the end of the studio project.
I don’t love to see people cut Session Four off because, in terms of the whole picture of art education, you really want kids to have an opportunity to reflect on their work, assess their work, display their work, review the steps that went into this, and review what they’ve learned about certain artists.
So that’s what Session Four is all about. It’s important. So I encourage you not to skip this part if time permits.
Art Show Discussion
Kids enjoy it! They enjoy reviewing and putting their stuff on display.
I put up some review suggestions and use those if you like them. Come up with your own if you want to. There are blank templates in there that you can make use of.
You just spread out all their artwork and have the kids gather around and talk about what they see. I put some questions to guide that conversation if you find that useful. That can be an organic conversation with whatever the kids want to respond to.

Self-Assessment
Then the last step is the self-assessment.
The first statement in the self-assessment says I made painted paper.
So you’re having them think way back to when they painted that paper. “How was I that day? Did I work productively that day? Did I contribute to that?”
The second statement says I cut many shapes out including Leaf, Star, Line, and Repeating Shapes.
So this one’s all about Session Two and how they did on cutting. Do they feel like they did everything they wanted to do on that day?
Statement Three says, I tried out different arrangements and glued several shapes to a black background paper.
So that one’s all about Section Three, the composition part, before they glued everything into place. Did they think artistically about how they arranged everything?
The fourth statement is also important. This is not something to be overlooked in art. I used my materials carefully and tried my best on this project.
This one is all about effort. Don’t compare yourself to anybody else. How did you do? Did you put forth your best effort?
It is always a goal of mine to try to give just at least a little bit of verbal feedback to each kid to help them feel seen.
I acknowledge that I saw what they did, and I try to think of something positive to say about it. That marks the end of this unit!
Early Finishers
I put in another early finisher there. It is a read-aloud called Henry Scissors.
Henry Matisse has a lot of storybooks for kids, so if you have another one in your own personal library, use it with any opportunities you have time-wise, like any time you finish a little earlier than expected. I never do, but I know people do and, if you do, then, fill it in with another book.
Have fun with this one! Please consider sharing your outcomes with the group photos, questions, or suggestions. These are all totally welcome in our community, so, please never hesitate to throw something out there.
And that’s it! I really hope that you and your kids learned some new stuff. Good luck to all of you. Okay, take care!

More About the Henri Matisse Art Unit
Introduce children to famous artworks and details about Henri Matisse as they transform paper and paint in this series of four elementary art lessons. Use the done-for-you digital storybook to look at his abstract collages and introduce students to a brief history of Henri Matisse. Then use the digital presentation with step-by-step art project directions to guide young artists as they “draw with scissors” to create a variety of organic shapes and then compose an abstract paper collage with the shapes.
Inside the unit you’ll find a 27-page unit guide full of information and tips for teaching this series of art lessons to students in kindergarten through grade 2.
✨You don’t need a lot of background knowledge of the artist or art curriculum, and you don’t have to do any extra research to teach these art lessons. I’ve included all the details here for you to open and go. Think of how much time you’ll save on planning!
The unit is broken down into four 40-minute sessions.
For each session there is a guided digital presentation that has already been prepared for you and can be used via Google Slides or PowerPoint. The presentation also introduces and guides you through completion of a studio project and follow-up activity.
The 100-page combined PDF and Google Slides full resource includes:
- An original digital storybook designed to expose students to famous artworks and details about Henri Matisse
- A literacy connection to Matisse’s Garden by Samantha Friedman
- A scissor safety sing-along and discussion
- A step-by-step studio project guide with clear directions, supply lists, and work sample photos
- Three pages of printable stencils
- Some quick fun facts
- A digital lesson review
- An art show prompt with guided questions
- A printable self-assessment
- Early finisher coloring page and sing-along suggestions
- Blank slide templates

 Van Gogh Starry Night Art Project and Elementary Art Lessons