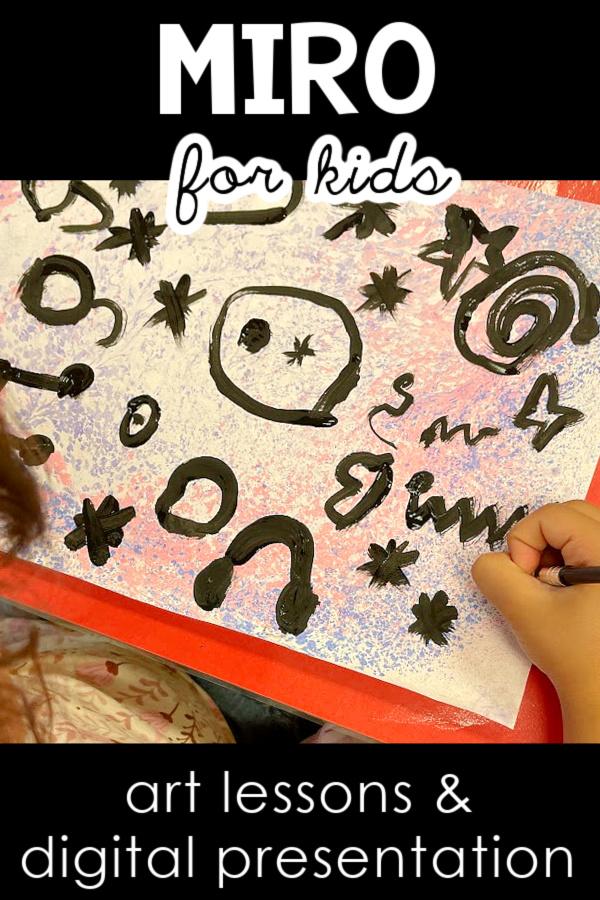
This abstract Joan Miró Art Project for kids is part of my kindergarten art curriculum. Because it is very open ended and focused on the use of abstract design, it is excellent for young kids who are eager to explore and experiment their art.
Famous Artist Series from Kids Art Projects 101
This approach is awesome because it layers art history connections with guided instruction about the elements of art and principles of design. The scripted PowerPoint format can be easily utilized in a variety of settings. In this video I share specific tips and considerations to help you implement the unit with ease.
Watch the video, or read the transcript below if you prefer.
~VIDEO TRANSCRIPT~
Hi Everyone,
I am excited to present to you the 15th installation in our Famous Artists’ Series. This one is all about Joan Miró. The purpose of this video is to give you an overview of how to set up the unit so that once you get started with your kiddos you can hit the ground running. So let’s dive right in.

I’ve organized this unit into four distinct sessions, ideally 40 to 45 minutes each. if you don’t have that kind of time, hopefully, you can listen to how I present this and figure out a way that will be modifiable and workable for you.
JOAN MIRÓ ART PROJECT SESSION 1

Joan Miró Digital Storybook
So in the first session, you are going to present to your kiddos a digital storybook. The digital storybook is designed to expose kids to lots of different works by Joan Miró.
I specifically highlighted a lot of Miró’s work from his Constellation Series because they are so awesome for young kiddos. They are jam-packed with organic lines and shapes and stars and zigzag kind of stuff that little guys seem to respond really well to.
So you are going to use them to unpack his work and help them dabble in his approach. Once you expose them to a bunch of his works, you are going to introduce the idea that they’re going to be trying something inspired by his style.
Start the Studio Project
Right here in Session One, you’re going to be diving into the first component of the studio project.
This is the kind of project that has to be built up in layers. So the first session is all about working on the background layer.
Now when you look at Joan Miró’s painting, you will see the background on his, almost all consistently, is given this sort of a real beautiful, ethereal wash. He does it with oil paint.
You are going to walk your kids through a step-by-step guide on how to get a similar effect in making a chalk print. There’s a step-by-step guide in the slideshow.
You’re going to need a shallow tray of water and you’re going to take chalk pastels with a little popsicle stick and you’re going to shave little dust from the chalk pastels to have it sprinkle down and sit right on top of the water.
Do not stir the water. You do not want to break that surface tension but once you’ve got this beautiful display of dust on top of the paper, colorful dust, you’re going to have the kids take a piece of paper and lay it right on top of the chalk.
Press it down flat, but not submerging it. Just sitting that paper gently on top of the water. Then they lift and it is that simple. You have a really gorgeous outcome. I did not save any of my fresh chalk prints, but if you look up close, you can see those gorgeous little details happening to that chalk in the background.
So you can have them do it with colors, but this one we did it with just black chalk. You can you can have fun with that. Let the kids have fun with that. But those need time to dry, which is why you got to get it out of the way right during that first session.
So once they make their chalk print, they need to set it somewhere to dry. It depends on the kids really.
Early Finishers
The size of the group you’re working with, you might get through that really quickly and have time for an early finish activity so I provided one.
But if you have a really large group, don’t beat yourself up. It may take you all the full 40 minutes to get everybody to the point where they have a chalk print that worked. So if you have extra time I threw this in there.
This is a Miró-inspired composition for them to color. It prompts them to think carefully about the colors they noticed in his work.
He primarily works with reds, yellows, blues, the primaries. Then green is another one he tosses in a lot, then black and white.
They can use crayons, colored pencils, and markers on this. Just have fun with it. If you are limited in your access to printers or printer ink, you might just put out fresh copy paper and have the kids freestyle their own composition at the end of that first session. That is okay too.
JOAN MIRÓ ART PROJECT SESSION 2

So for the second session, you are going to be talking to the kids about Miró’s use of line and shape. You’re going to really look closely at one specific painting that he made and you’re going to break it down, almost like a little scavenger hunt, and have the kids looking for very specific things.
They’re going to be looking for organic shapes. You’re talking about that word. What does that mean? How do we find that?
They’re going to be looking for stars, and specific types of lines: straight lines, curvy lines, and zigzag lines.
Then the last one is eyes. Miró tends to include so many really cool little eyes and stuff in his pictures. So I put together a little resource that they can use to familiarize themself with with Miró’s language.
The bank of shapes that he tended to rely on for his images. Organic shapes, lines, dots, eyes, and stars. So you’re going to use these with the kids as a group.
In the slideshow, I pre-built it for you, to build a composition. Okay, we’re going to start with an organic shape. Okay now let’s say we add a straight line on top of this. Okay, now what if we add stars?
So they get to see a big, large, picture on the screen and see how a picture like this can come together with all those little elements. Just give them a sense of how you are using this limited range of shapes and lines to build what ends up being a pretty complex abstract design.
So once you walk them through that, you are going to hand them their dried chalk print back and give them a paintbrush with some black tempera paint. The goal there will be for them to use the paint to paint their own image inspired by what they’ve been seeing in Miró’s paintings.
So this one doesn’t have a chalk print behind it, but you’re basically having them think about, okay, what if I added a curved line or a star shape or an eye? How they put it together is anyone’s guess. And that is what is so fun about it…how different the outcome can be using that same small bank of shapes and lines!

Sometimes I display this digitally in front of the room and have them, but if you want to print a bunch of these out and put them around the room so that kids can look at them while they work, that might work too.
It is not essential that they do an eye that looks just like one of these. It is just a reminder of the broad categories that they can use as a resource.
So once they get done with their painting, that usually will take you full through the end of the second session. If, for some reason, you have some extra time, you can have them go back to that coloring page, or I present a couple of early finisher options at the very end that you could toss in any way you want.
JOAN MIRÓ ART PROJECT SESSION 3

Finish the Studio Project
So for Session Three, you’re going to be having them look specifically at his use of color. So in this session, you’re looking closely at some of his pieces and looking at how he worked with such limited colors.
Then you are going to hand them oil pastels and hand them their dred painting back. They are going to add red, yellow, blue, green, and some black in there.
Because you’re working with oil pastels, you want to remind the kiddos to keep their hands away from their eyes or their mouth. They’re going to need to wash their hands.
This particular chunk of the studio project doesn’t take a ton of time, so you will most likely end up with a little extra time at the end of this session.

So I included a little dice game. Maybe you have seen these before. Kids love them. They really do love them.
You’re going to need either need a copy of this or they need a good view of it on a screen somewhere. Then they need a single die. They don’t need a pair of dice. They just need one die, a pencil, and a piece of paper.
So what they do is, they roll the die. If they roll a one, they’ve got to add this little type of line. If I rolled a four, I have to add a star. If I roll a six, I have to add this little type of line.
So you work your way through to build up the composition. It’s extremely similar in the end. So it’s the same aesthetic we were working on in the painting.
It’s just a different approach where you’re leading it up to chance and they seem to have fun with that one.
So if time permits, of course, they can add color to that one. I’ve had kids who end up liking that one more than the painting, so don’t dismiss that. It doesn’t have to be an afterthought.
They might end up liking that more than their studio project and that is perfectly okay. That takes you to the end of the third session.
JOAN MIRÓ ART PROJECT SESSION 4

Lesson Review
Now for the fourth session, you are going to be reviewing your lesson.
- What did we even learn here?
- What was this all about?
- Who is this artist?
- What do we know about him?
- What are some key takeaways?
I put in some guided question and answer options for a review. You can also use some blank slides to customize your own review, if your conversation about him, or about the work, went in a different direction.
Customizing this is perfectly acceptable. That’s why I put the blank slides in there. The review, by the way, is just a group conversation.
Art Show
Then we do an art show. You want to have them spread all of their finished projects on the floor or on a table. The kids form a circle around them. You really are just attempting to get them to practice talking about their work, looking at how they did, looking at how their friends did.

You’re not trying to force comparisons or anything like that but just getting a gauge of it.
- How does it look?
- Does it look like I tried as hard as everybody else?
- Do I look like I got it and I understand the assignment?
- Do I look like I was on task?
- Which one of these has the most amazing chalk print?
You walk through what it is they should be looking at because sometimes they get a little overwhelmed. Sometimes I get a chatty group. They don’t need any prompting. They talk and have a delightful conversation about the projects without any guidance from me. But I included some discussion prompts, if you have a quiet group that’s needing a little more structure to that art show conversation.
Self-Assessment
So the last component is a self-assessment and the self-assessment again could be printed out. It prompts kids to rate themselves on the different components of this unit.
- I made a chalk print.
- I painted Miró inspired lines and shapes.
- I added color with oil pastel.
- I used my materials carefully and tried my best one this project.
So that’s where you’re talking about effort and craftsmanship. There’s a little spot for teacher feedback.
If you not printing these out, you might just want to walk around the room and make a point to give each kid some one-on-one feedback. They really absorb that and don’t hear a ton of feedback about their own work.
You don’t want to be saying things like, “Oh, that’s really good.” or “I like yours.” You want to be really specific.
“I noticed you look like you’re getting more in control of your brush strokes.” “Notice how careful you’re coloring in those shapes.” “I love the colors you chose for your chalk print.” That kind of thing.
Be as specific as possible. Getting them to realize that those little details are going to add up and are noticeable. And that’s it.
I hope that you have fun with this one. You can bundle everything up and paper clip it together and send it all home after the end of that fourth session, or have a display. Whatever works for you.
But if you end up having fun with this one and happen to capture some pictures of your kids In action, please don’t hesitate to share them with the group on our Facebook Group.
If you have any questions, don’t hesitate to reach out to me. I would love to hear from you. I think that takes it to the end for us on this one. Take care, everybody!

More About the Joan Miró Art Unit
Introduce children to famous artworks and details about Joan Miró in this series of four elementary art lessons. Use the done-for-you digital storybook to look at his famous artworks and introduce students to a brief history of Joan Miró and abstract art. Then use the digital presentation with step-by-step art project directions to guide young artists as they experiment with color and line and create a Miró-inspired painting.
Inside the unit you’ll find a 27-page PDF unit guide full of information and tips for teaching this series of art lessons to students in preschool through grade 2.
✨You don’t need a lot of background knowledge of the artist or art curriculum, and you don’t have to do any extra research to teach these art lessons. I’ve included all the details here for you to open and go. Think of how much time you’ll save on planning!
The unit is broken down into four 40-minute sessions.
For each session there is a guided digital presentation that has already been prepared for you and can be used via Google Slides or PowerPoint. The presentation also introduces and guides you through completion of a studio project and follow-up activity.
The 115-page combined PDF and Google Slides full resource includes:
- An original digital storybook designed to expose students to famous artworks and details about Joan Miró
- A step-by-step studio project guide with clear directions, supply lists, and work sample photos
- A Miró-inspired coloring page
- A Miró-inspired dice game
- A digital lesson review
- An art show prompt with guided questions
- A printable self-assessment
- Early finisher suggestions
- Blank slide templates

 Hokusai The Great Wave Art Project and Elementary Art Lessons